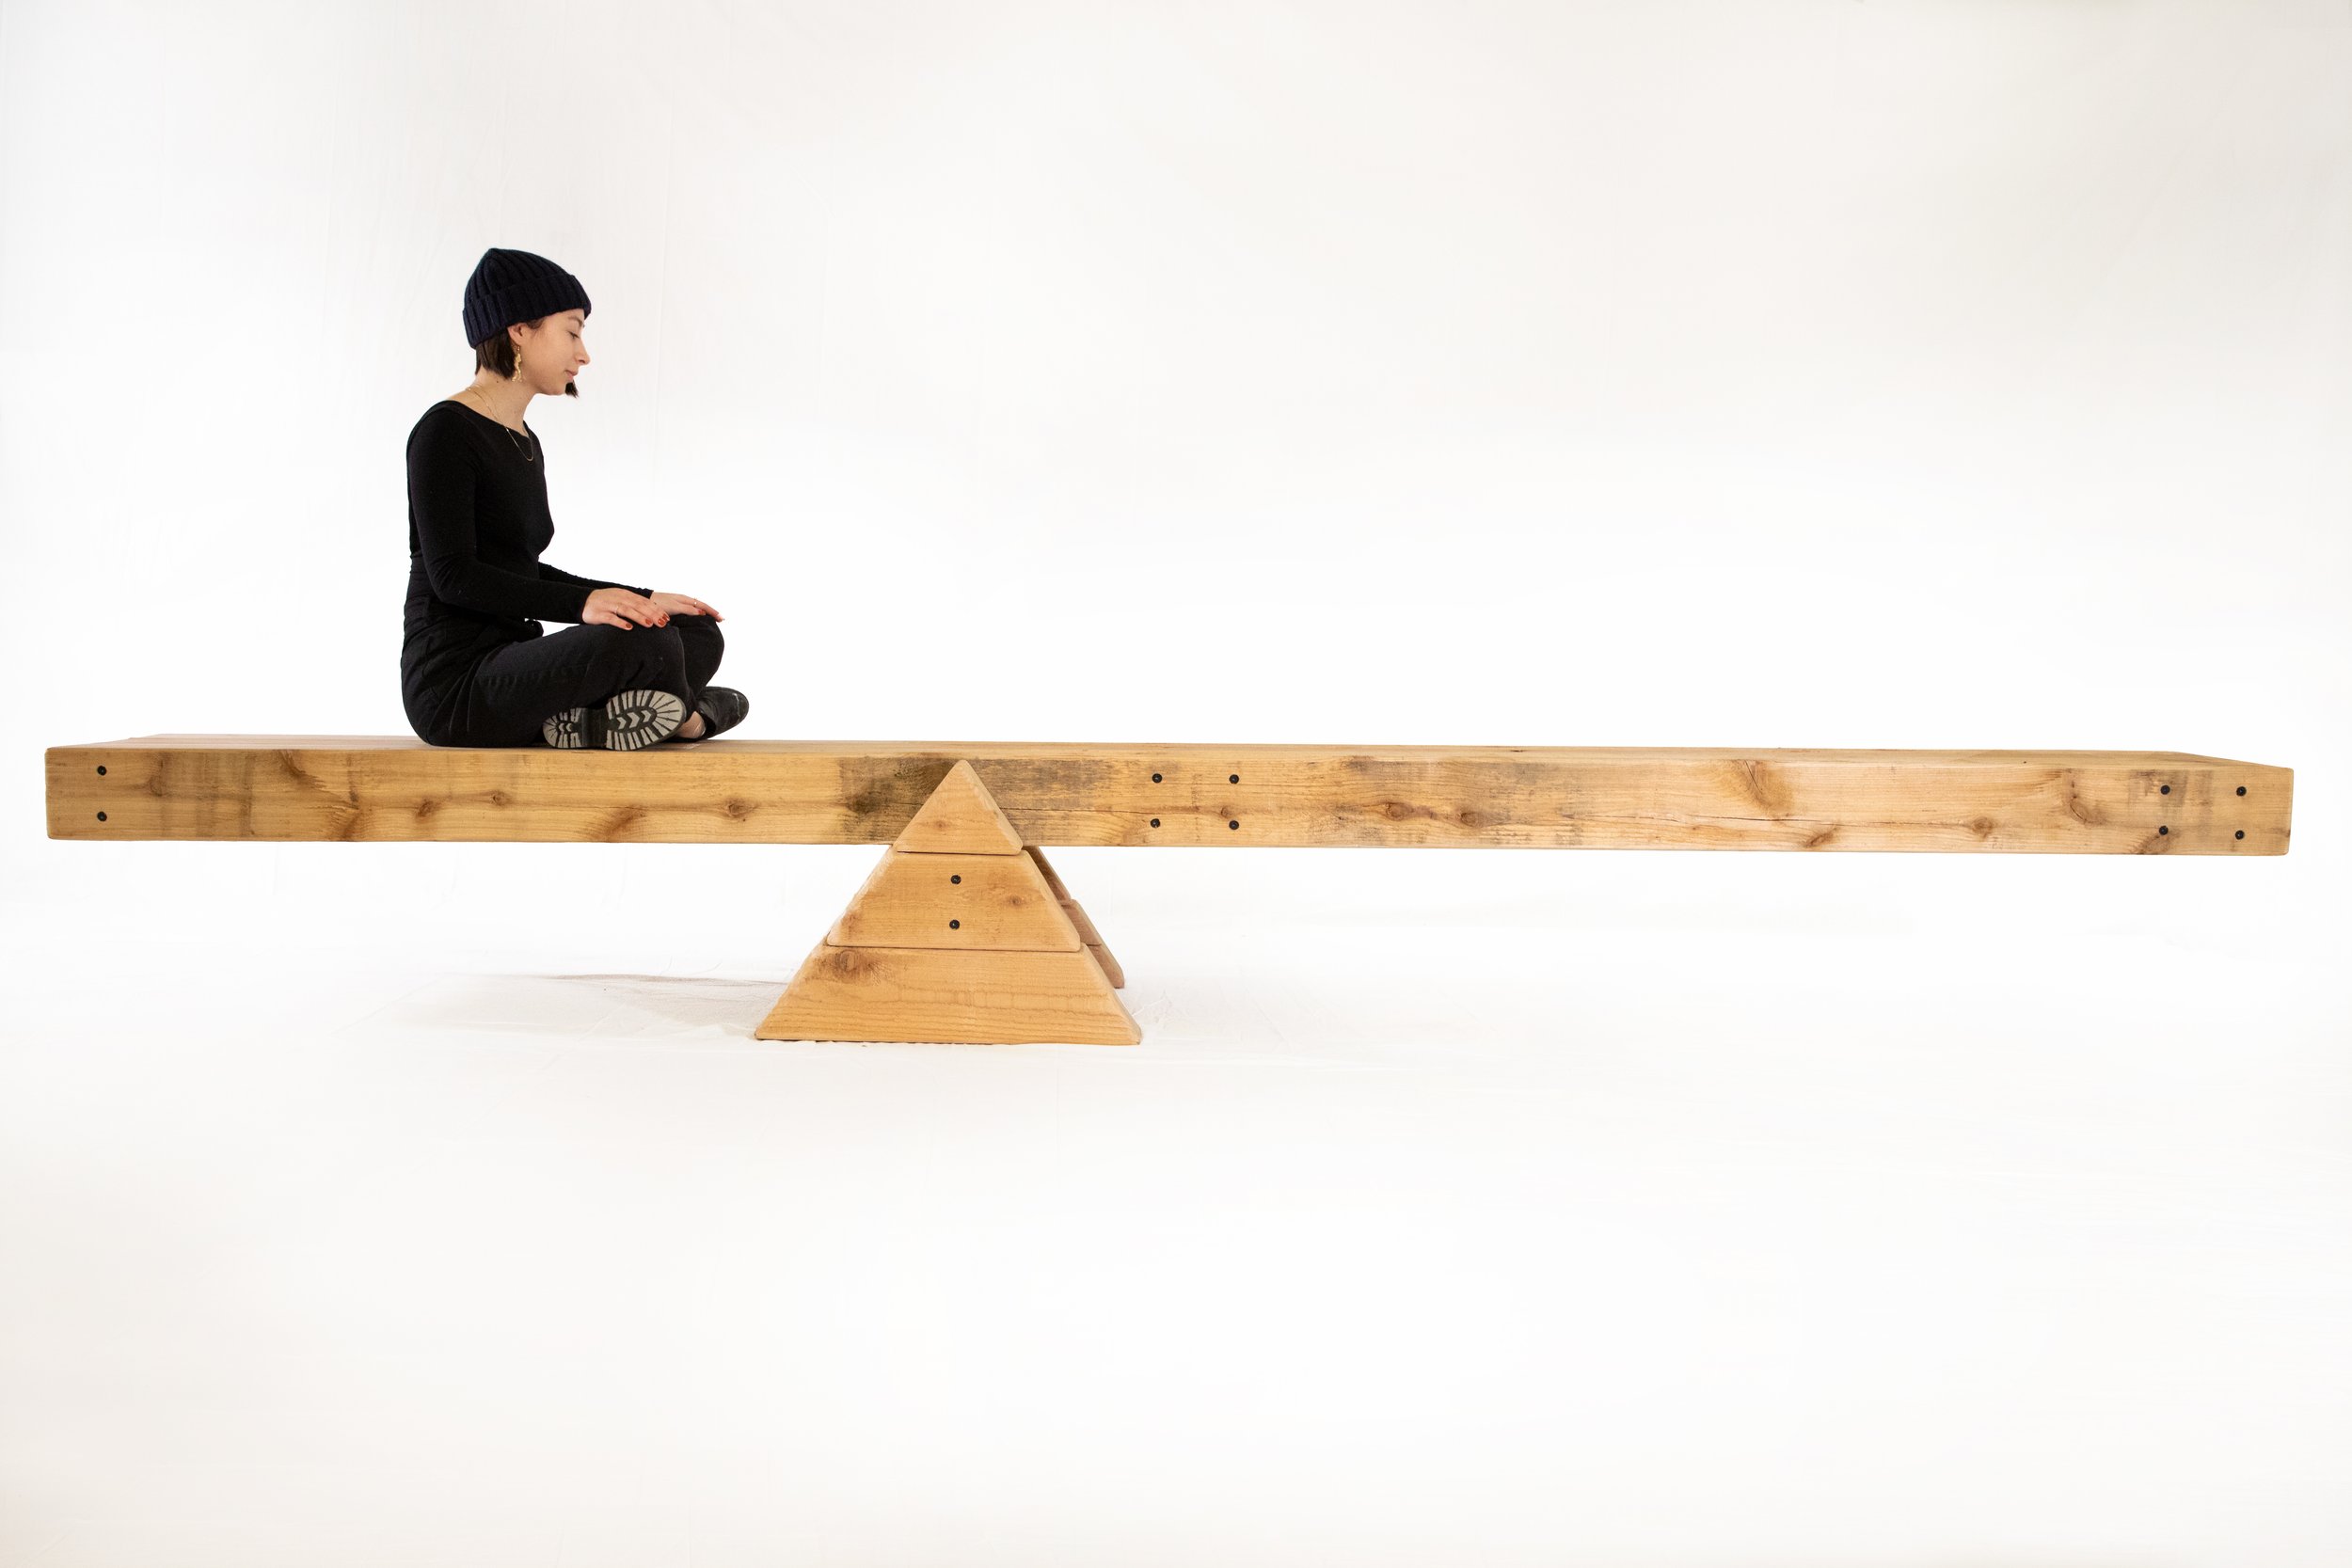
My first and only gallery show I had in Boston was a group show with the other teachers who taught at the Eliot School in a cool gallery in the arts districts. We were all excited and the opening was packed. I just finished my three-legged desk that featured a CNC carved bottom that I designed with my great friend and collaborator Magenta Pinruethai. The whole thing shape like an ameba. Organic free flowing soft shape carved with a grid of protruding squares on the bottom. The squares, a nod to architect Frank Fitzgibbon, who featured that last detail in his Casa Moderna house of which I built the model for as my first job in LA. It was also a shrunken down version of a proposal for a dining room table. But. . . they also wanted my perch chair which I reluctantly said yes to. My lack of desire justified by the fact that it was on older and quite heavy.


Four days after our opening, COVID started shutting everything down. Six days after the opening, a pipe burst and floated the entire gallery with 20 inches a Bostonian grey water. Which has two meanings.

ET and Eliot Quarantined

In Boston Gray water is sewer. My chair and desk were submerged in 20 inches of Bostonian sewer water for 48 hours. Just marinating in the stagnant tea because the city closed the whole area while they fixed the breach and cleaned up. They soaked in the brew for days. When it was drained no one could go in for weeks until the insurance company addressed the damage.
I got a call during shutdown saying you have a 3-hour window to pick up work or it would be thrown out. Where was I going to put toxic Bostonian shit-soaked furniture during COVID? My roommate would not let it in her house. I said, “throw it out,” with my heart breaking. I wrote my boss Abigail Norman and she wrote back “Does Mike have permission to pick it up?” I said, “sure but I can’t store it.”
I could barely think the rest of the day. What had I done? But COVID was scary. Bostonian sewage had to be crawling with it. That afternoon I drove home super down. Then I got a text from Abigail.
“Andrew my roommate and I went and picked up your furniture. We put them at Mike Gleasons’ shop in the back storage. He sprayed them with a bleach for you. He said they can sit and dry as long as needed.”

Abigail in her garden with Jazz (note: Jazz is not Abigail’s roommate but I like the photo:)
Abigail went and saved my furniture during COVID! I couldn't believe it! She was so brave. My heart was filled with gratitude! It still is!! I was struggling balancing my job with my work. It was an effort to make this last desk. When the flood happened, I took it as a sign that I was not supposed to create furniture anymore. Then Abigail and her roommate, Fifile Nguyen, risked their lives and their backs and managed to fit my heavy chair and carved table in her small car. All during a scary quarantine.
They sat for over a year in Mike Gleason studio. When we finally opened the school for students to retrieve their abandoned projects, Mike popped in with my work. He his the kindest person and an amazing teacher. I thanked him for all of this and the fact that he risked his health to store my work. He just gave me a humble smile and said it was nothing.

Perch Chair grinding at The Eliot School
I took a grinder and skimmed a bunch of wood off the chair and table. It looked horrible. I brought the skinned chair to Michigan and when spring hit, I suddenly wanted to carve.

Perch carving in progress
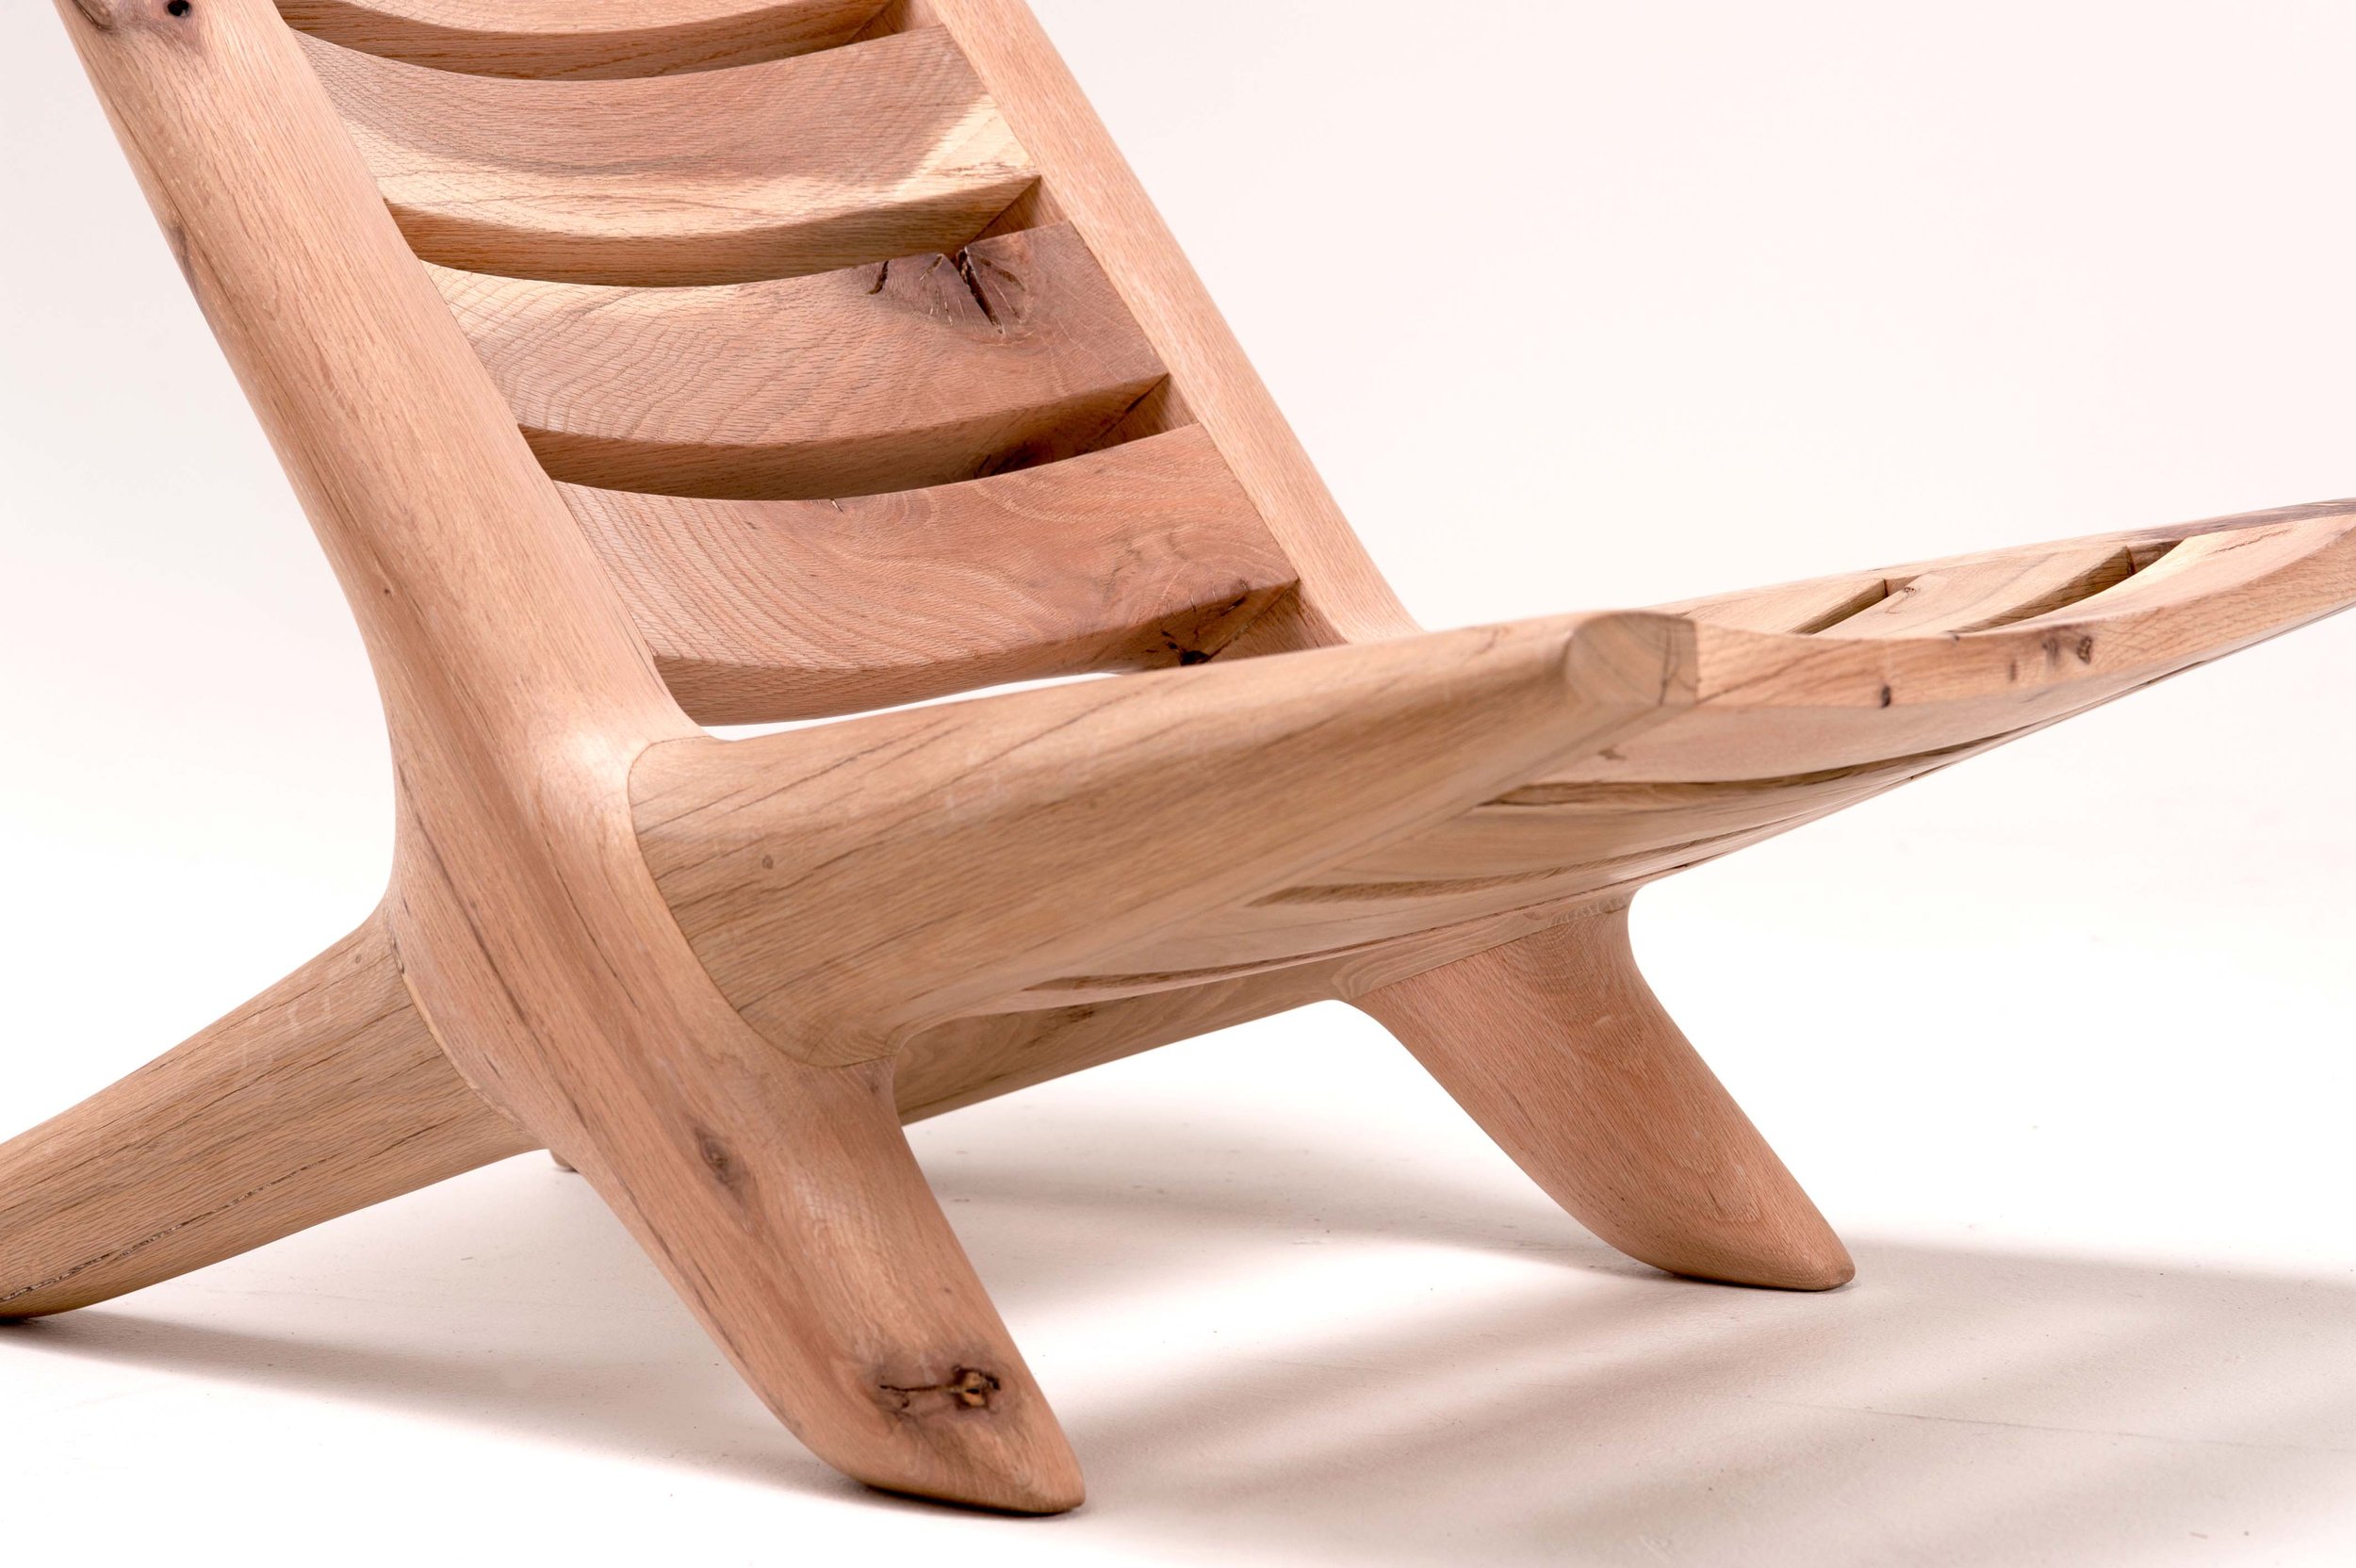
In fact, I made the chair six years earlier with intention to carve it. Everything was built with bulky live tenons. I remembered where all the hidden joinery was. It was made to carve but I chickened out. It was cool square and stiff, I had a deadline, so I stopped. Chickened out meaning not brave enough to carve.


I had this chair, an angle grinder, and I started grinding. I strongly disliked the top two rungs of the back because you could not rest your head comfortably. So, I got a Kataba hand saw and cut them off. Then I just started carving in my garage, shaping, and molding, trying hard to not go too deep as to expose the live mortise and tenon joinery. Five years later I realized I could carve.

The reality is the chair was sealed with five coats of tung oil and several coats of wax. Moisture did get under this finish, but I think I carved off most of it with the grinder back east. To me this was a new chair, and I was apprehensive to tell anyone at school about the sordid history.

When I think back it was always an unfinished design. It was good enough, so it would have stayed that way if it were not ruined. It needed a disaster and a hero to save it before it could finally be realized at Cranbrook. A theme at my 3D critiques was people thought I was holding back. This sparked a spontaneity that freed up my fear of carving.